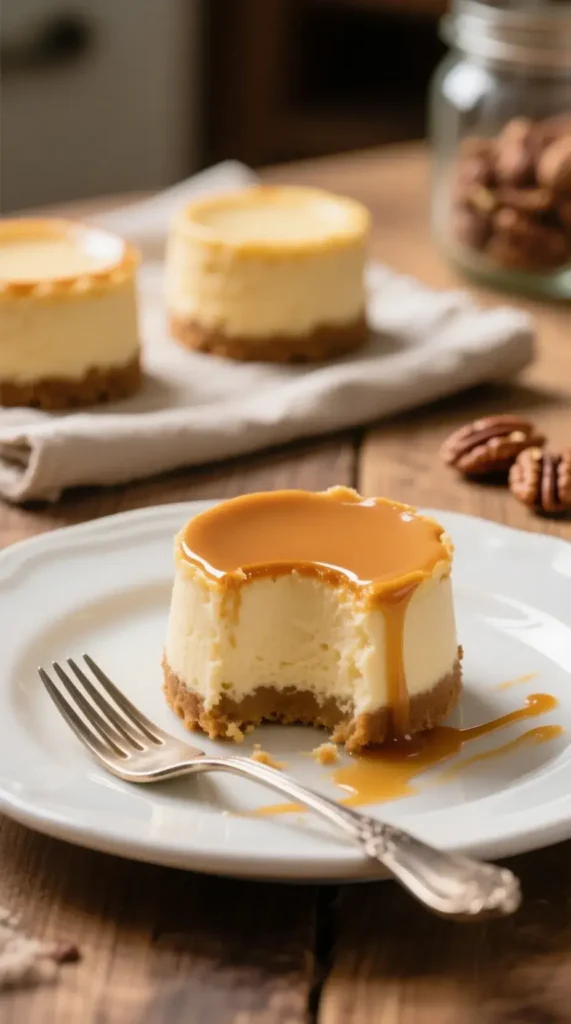
When it comes to desserts, few can match the allure of cheesecakes. Add a touch of chocolate, caramel, and nuts, and you’ve got something truly special. That’s where the mini turtle cheesecakes come in. These individual treats capture all the flavors of the beloved turtle candy in a cheesecake form. This recipe is simple yet impressive, making it perfect for gatherings or a sweet escape after a long day. Let’s dive into the world of mini turtle cheesecakes and discover some ways to make this delightful dessert shine!
What are Turtle Cheesecakes?
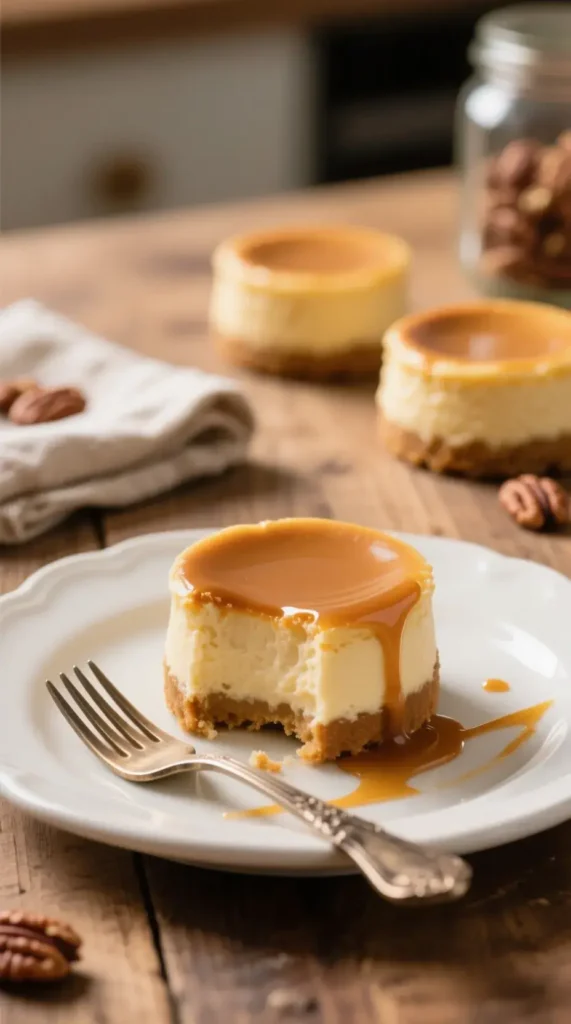
Turtle cheesecake merges the rich, creamy goodness of traditional cheesecake with the incredible combo of chocolate, caramel, and pecans, giving it a peculiarly delightful taste. The name comes from the classic turtle candy, which consists of chocolate, caramel, and nuts, and it fits the flavor profile. Instead of a large slice, mini versions provide portion control and are great for parties.
Origin of the Turtle Candy
Turtle candies have been adored for generations. They’re believed to have originated in the early 1900s. The concoction usually combines caramel and nuts coated in chocolate, resembling the shape of a turtle. Bakeries and candy makers give a shout-out to this by creating turtle-inspired desserts, including the heavenly turtle cheesecakes. It’s as if each bite carries a sweet history!
The Allure of Mini Desserts
Mini desserts like mini turtle cheesecakes are not just cute—they’re also practical! These little wonders make entertaining easy. Guests can enjoy them without committing to a large portion. Plus, they’re more fun to eat, and they allow for a variety of flavors on a dessert table.
Ingredients for Mini Turtle Cheesecakes
To whip up your own mini turtle cheesecakes, here’s what you’ll need. Remember, quality matters. Opt for fresh ingredients when you can!
For the Crust
- 1 cup graham cracker crumbs: Acts as the base.
- 1/4 cup unsalted butter, melted: Binds the crumbs together.
- 2 tablespoons sugar: Adds a hint of sweetness.
For the Cheesecake Filling
- 16 oz cream cheese, softened: The star of the show!
- 1/2 cup granulated sugar: Sweetens the mixture.
- 1/4 cup sour cream: Adds creaminess and a slight tang.
- 2 large eggs: For structure.
- 1 teaspoon vanilla extract: Enhances flavor.
For the Toppings
- 1/2 cup caramel sauce: For that rich sweetness.
- 1/2 cup chocolate sauce: Adds decadence.
- 1/2 cup chopped pecans: Crunchy contrast.
Equipment Needed
Before you start baking, gather your tools. Here’s your essential checklist:
- Mini muffin tin: For the individual cheesecakes.
- Mixing bowl: A good-sized bowl for combining ingredients.
- Electric mixer: An absolute must for smooth cheesecake filling.
- Measuring cups and spoons: Precision is key.
- Spatula: For scraping and mixing.
Step-by-Step Guide: Making Mini Turtle Cheesecakes
Ready? Let’s get baking! Here’s how you can create these divine mini turtle cheesecakes.
Preparing the Crust
- Preheat Your Oven: Set your oven to 325°F (163°C). This will ensure it’s ready for the cheesecakes.
- Mix the Ingredients: In a bowl, combine the graham cracker crumbs, melted butter, and sugar. Stir until everything is well mixed, resembling wet sand.
- Press Into Muffin Tins: Take a mini muffin tin and line it with cupcake liners. Use a spoon or your fingers to press the crumb mixture into the bottom of each liner. Ensure an even layer so they bake nicely.
- Pre-bake the Crusts: Pop your muffin tin into the oven and bake for about 5-7 minutes. This helps set the crust.
Making the Cheesecake Filling
- Mix the Cream Cheese: In a mixing bowl, beat your softened cream cheese until smooth and creamy. This avoids lumps in your cheesecake.
- Add the Sugar: Gradually add the granulated sugar while still mixing. Ensure it’s fully incorporated.
- Incorporate Other Ingredients: Add in sour cream, eggs, and vanilla extract. Mix until fully blended. Be careful not to overmix, as that can introduce too much air.
Assemble the Cheesecakes
- Fill the Crusts: Once the crust is pre-baked, remove it from the oven. Fill each crust with the cheesecake batter. Aim for about 3/4 full, as they will puff up slightly while baking.
- Bake: Return to the oven and bake for 15-20 minutes. The cheesecakes should be set but still slightly jiggly in the center.
- Cool and Chill: After baking, allow them to cool in the tin for 10 minutes. Then, remove and refrigerate for a minimum of 2 hours, or overnight if you’re really patient!
Finish with Toppings
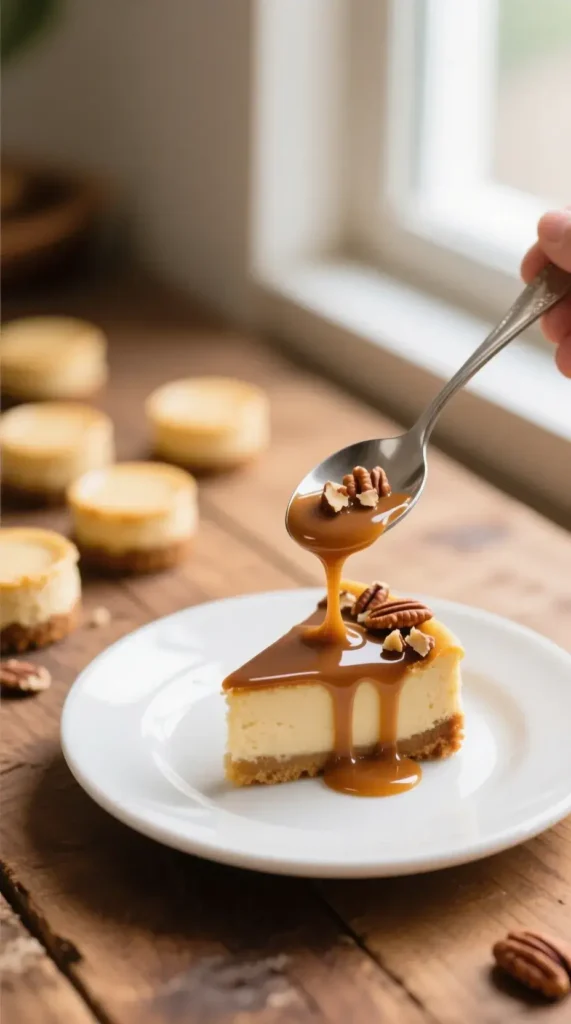
- Add Caramel and Chocolate: Before serving, drizzle the cooled cheesecakes with caramel and chocolate sauces.
- Sprinkle Pecans: Finish by adding a generous sprinkle of chopped pecans. This step adds that delightful crunch!
Serving Suggestions
Serving mini turtle cheesecakes can be just as fun as making them! Here are a few ways to present them:
- On a Dessert Table: Arrange them neatly to create a stunning display.
- In Individual Servings: Use stylish dessert cups for a trendy twist.
- Pair with Coffee or Tea: Their rich flavors complement warm beverages perfectly.
Tips for Perfect Mini Turtle Cheesecakes
- Room Temperature Ingredients: Always use cream cheese and eggs at room temperature for a smoother texture.
- Avoid Overbaking: Keep a close eye on the timing. Overbaked cheesecakes can become dry!
- Don’t Skip the Chill Time: Patience is key. Chilling enhances the overall flavor and texture.
Common Mistakes to Avoid
Baking can be tricky, but avoiding these common pitfalls can lead to delicious mini turtle cheesecakes.
- Using Cold Ingredients: This leads to lumps in your cheesecake.
- Neglecting to Pre-bake Crusts: Skipping this step can result in a soggy base.
- Overmixing: It introduces air into the batter, leading to cracks.
- Skipping Drizzle: The caramel and chocolate topping really make it! Don’t skip this.
Nutritional Information
Want to know what you’re working with in terms of calories and contents? Here’s a closer look.
| Ingredient | Calories (per serving) |
|---|---|
| Mini Turtle Cheesecake | Approximately 200-250 |
Note that the exact nutritional values can vary slightly based on factors like brand and ingredient choices.
Variations on the Classic Recipe
Feel like switching things up? Try these variations of mini turtle cheesecakes!
- Chocolate Cookie Crust: Swap out graham crackers for chocolate cookies like Oreos for a richer taste.
- Nut-Free Version: Replace pecans with crushed pretzels or even crushed graham crackers for crunch without the nuts.
- Fruity Twist: Add a layer of fruit preserves underneath the cheesecake layer for an unexpected burst of flavor.
- Baked vs. No-Bake: For a quicker version, go for a no-bake cheesecake filling. Just mix and chill!
Storing Mini Turtle Cheesecakes
Want to make your mini turtle cheesecakes ahead of time? Here’s what you need to do:
Refrigeration
- Keep in Fridge: These cheesecakes are best enjoyed fresh but can be stored in the fridge for up to a week.
Freezing
- Freezing for Later: If you want to make them further in advance, they can be frozen. Just wrap each cheesecake tightly in plastic wrap and store in an airtight container for up to 2 months.
Thawing
- Safe Thawing: To thaw, simply place in the fridge overnight. Avoid microwaving, as this can make them rubbery.
Final Thoughts
Mini turtle cheesecakes are a delightful blend of flavors and textures that anyone can try at home. They’re simple, elegant, and downright irresistible. From their rich cheesecake base to the added layers of caramel, chocolate, and pecans, they offer a bite-sized experience of joy. Whether you’re hosting a gathering or treating yourself, give this mini turtle cheesecake recipe a try!
With this complete guide, you now have the knowledge and confidence to bake something that not only appeals to the taste buds but also creates memories. Enjoy diving into this delightful dessert;you’re in for a treat!
