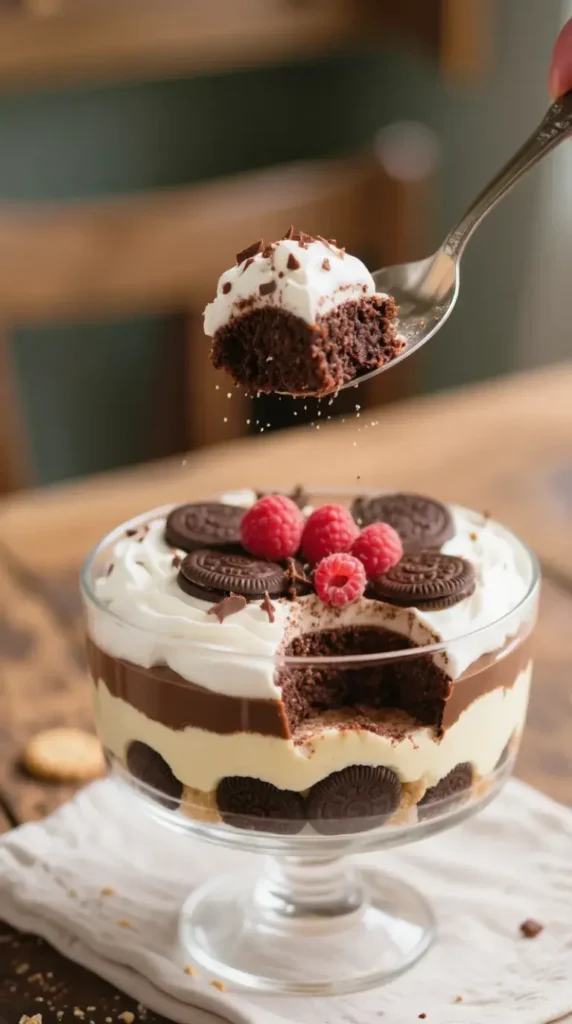
Oh, chocolate lovers, are you ready to have your taste buds tickled? The Heavenly Chocolate Cheesecake Trifle is a stunning dessert that combines rich layers of chocolate cheesecake, creamy whipped toppings, and delightful crunchy elements. This treat captures all the decadent flavors of chocolate and cheesecake, presentation’s a feast for the eyes, and it’s super easy to prepare. Let’s dive right into this chocolate heaven!
What Is a Trifle?
Alright, let’s start with a basic understanding. A trifle is a layered dessert, traditionally consisting of fruit, sponge cake, or ladyfingers, custard, and whipped cream. The beauty of trifles lies in their versatility. You could mix and match ingredients based on your cravings or what you have on hand.
The Evolution of Trifles
Historically, trifles have English roots dating back to the 16th century. They were initially composed of a more complicated arrangement of ingredients, including flavored creams. However, with time, the dessert evolved into the simpler and more accessible form we enjoy today. The modern rendition often incorporates favorite flavors, like chocolate!
Ingredients Needed For Heavenly Chocolate Cheesecake Trifle

To whip up a Heavenly Chocolate Cheesecake Trifle, you’ll need a solid mix of rich and creamy ingredients. Here’s what you’re gonna grab from the pantry and fridge:
- For the Chocolate Cheesecake Layer:
- 16 ounces cream cheese (softened)
- 1 cup powdered sugar
- 1/2 cup unsweetened cocoa powder
- 1 teaspoon vanilla extract
- 1 cup heavy whipping cream
- For the Whipped Cream Layer:
- 2 cups heavy cream
- 1/2 cup powdered sugar
- 1 teaspoon vanilla extract
- For the Crunchy Layer:
- 2 cups chocolate cookies (crushed into crumbs)
- 4 tablespoons melted butter
- To Garnish:
- Chocolate shavings
- Fresh berries (like raspberries or strawberries)
Let’s break this down. You’ll notice the star here is chocolate, but cream cheese takes center stage in that cheesecake layer. The cookies give a delightful texture contrast that keeps it interesting.
Equipment You’ll Need
Now, having the right tools can make a big difference in crafting this masterpiece! You won’t need a lot, just some essentials like:
- Mixing bowls
- Hand mixer or stand mixer
- Trifle dish or large glass bowl (make sure it’s clear for the pretty layers!)
- Rubber spatula
- Measuring cups and spoons
These might seem basic, but trust me, using good quality equipment yields better results.
Preparing the Chocolate Cheesecake Layer
The chocolate cheesecake layer is where the magic truly happens. Here’s how you blend those luscious flavors:
- Soften the Cream Cheese: Put your cream cheese out for a bit prior to mixing it. It needs to be super soft. Cold cream cheese doesn’t blend well, and you want a creamy, smooth mix.
- Mixing It Up: In a large bowl, combine softened cream cheese, powdered sugar, unsweetened cocoa powder, and vanilla extract. Mix them well until you get a smooth consistency. This’s where you start smelling that chocolate heaven!
- Whip the Cream: In another bowl, whip your heavy cream until stiff peaks form. It usually takes about 5–7 minutes with a hand mixer. This’ll add lightness to your cheesecake layer.
- Fold Together: Carefully fold the whipped cream into the cream cheese mixture. Use a spatula and go gentle. This keeps the fluffiness intact, which is super important.
Your chocolate cheesecake layer is now complete and ready to be layered up with the next elements!
Making the Whipped Cream Layer
The whipped cream is more than just a pretty topping; it adds a luscious texture that enhances the overall flavor. Let’s get it done!
- Cold Heavy Cream: Start with really cold heavy cream to whip. Cold is crucial! Pour it into a large mixing bowl.
- Add Powdered Sugar and Vanilla: Adding powdered sugar will help stabilize the cream and add some sweetness. Mix well till it thickens and holds stiff peaks.
It’s simple and oh-so-satisfying, with that airy quality that just melts in your mouth!
Creating the Crunchy Layer
Don’t overlook the importance of the crunchy layer; it adds depth and contrast! This is how you put it together.
- Crushing the Cookies: Grab those chocolate cookies and crush them up! You can use a food processor for an easy time or just place them in a zip-lock bag and smash ‘em with a rolling pin.
- Mix with Butter: In a bowl, combine crushed cookies with melted butter. This mixture should be crumbly yet stick together when pressed.
Now you’ve got that crunchy layer ready for the trifle!
Layering Your Heavenly Chocolate Cheesecake Trifle
This is the part where it all comes together. You get to build your trifle layer by layer for that beautiful visual appeal.
- First Layer: Start by spooning some of the crunchy cookie mix into the bottom of your trifle dish. Make sure it’s an even layer.
- Second Layer: Next, add a generous layer of the chocolate cheesecake mix. Use a spatula to spread it out evenly.
- Third Layer: Follow this with a layer of whipped cream. Take your time, dressing it up pretty.
- Repeat: Just keep repeating the layers until you’ve used everything up! Aim for at least three layers, but you can go as high as you wish.
- Final Touch: Top off with a final flourish of whipped cream and sprinkle some chocolate shavings or fresh berries for that beautiful contrast.
Chilling Time
Once your masterpiece is assembled, it’s best to let it chill in the fridge. This helps all those flavors meld beautifully. Aim for at least two hours, but if you can leave it overnight? Even better. The wait will make the first bite even more delightful!
Why Chilling is Important
- Flavors Meld: Allowing time in the fridge lets the chocolate flavors deepen and blend.
- Texture Improvement: The cream will firm up somewhat, making the layers slice cleaner.
- Presentation: A chilled trifle looks neater when served, preventing it from becoming a melted mess.
Serving Suggestions
When you’re ready to serve your Heavenly Chocolate Cheesecake Trifle, here are some great tips:
- Use Clear Glasses for Individual Servings: Not only does it look classy, but each guest gets their own personal dessert.
- Make It Ahead: If expecting guests, you can prep this a day ahead. Trust me, it’ll save you time and stress.
- Pair with Coffee: This dessert goes great with a cup of coffee or espresso. The bitterness of coffee contrasts beautifully with the sweet chocolate.
Storing Leftovers
If there’s any leftover trifle—which is unlikely, ‘cause it’s that good—you’ll still want to know how to keep it. Here’s the lowdown:
- In the Fridge: Cover your trifle dish with plastic wrap or a lid to keep it fresh. Consume within 3-4 days.
- Freezing: It’s not ideal, but you could freeze some trifle components like the cheesecake mix. However, it’s best enjoyed fresh.
Nutritional Information
Let’s be real; this Heavenly Chocolate Cheesecake Trifle is a dessert, and desserts sometimes come loaded with calories. Here’s a rough idea of what to expect per serving, depending on ingredient brands used:
| Nutritional Value | Per Serving (1/10 of Trifle) |
|---|---|
| Calories | 400-500 |
| Total Fat | 30g |
| Saturated Fat | 15g |
| Cholesterol | 90mg |
| Sodium | 150mg |
| Total Carbohydrates | 40g |
| Dietary Fiber | 2g |
| Sugars | 30g |
| Protein | 5g |
Keep in mind, portion sizes can vary. This info’s just a guide!
Variations of the Heavenly Chocolate Cheesecake Trifle
Want to jazz things up a bit? Here are some variations you could try:
- Fruit Inclusions: Add layers of fresh fruit, like strawberries or banana slices, to brighten things up.
- Nut Crunch: Swap out half the cookies for chopped nuts for added crunch and flavor.
- Peanut Butter Twist: Add a layer of peanut butter whipped cream for that glorious chocolate-peanut butter combo.
The scope for creativity is endless!
Conclusion
With the Heavenly Chocolate Cheesecake Trifle, you’re not just creating a dessert; you’re constructing a divine experience that deserves to be savored. It’s a complex blend of textures, flavors, and colors that brings joy to any occasion. This trifle isn’t just for special occasions, but it can really elevate gatherings, birthdays, or a casual movie night at home. So gather your ingredients, embrace your inner baker, and elevate your dessert game with this magnificent treat!
